
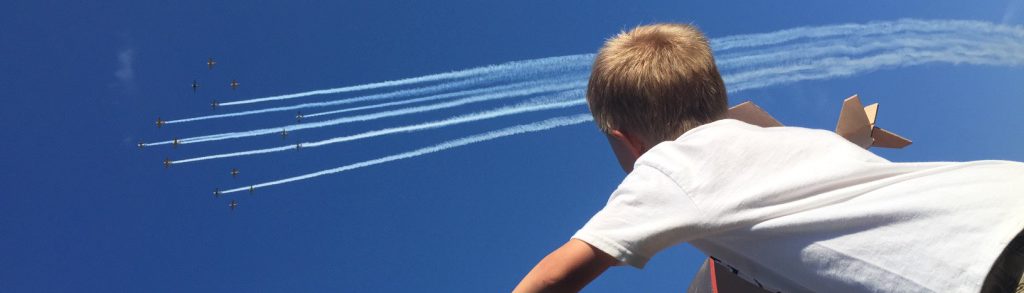
Get it right now or live with it in the air
BEFORE YOU GO
“Far better to be on the ground wishing we were in the air than to be in the air wishing we were on the ground.”
“The most useless things in aviation are the runway behind you, the air above you, and the fuel in the fuel truck.”
Pilots seem to love aphorisms. If you fly long enough, you will hear them all. Above are two of the most ubiquitous and most clichéd. Their original authors are long forgotten, but I guarantee you will hear them again and again. Like most aphorisms, they are essential truths having become cliché. They apply to many situations, but they colorfully describe the folly of taking to the air unprepared.
Less poetic, but admirable for its clarity, FAR Part 91 91.7 (b) says unequivocally, “The pilot in command of a civil aircraft is responsible for determining whether that aircraft is in condition for safe flight…..”
That process of determining that safe flight condition begins with proper maintenance and its documentation and includes intermediate steps, but it ends with those checks we do just before launching into the air. This is our last chance to satisfy ourselves that the critical systems of our airplane are functioning as necessary and that all of our settings and configurations are as they should be. Change it or fix it now — or live with it in the air.
Start and taxi
First, a note about starting the aircraft and taxiing prior to takeoff. A detailed primer on starting aircraft engines, with their different fuel systems, is for another time and place. But once you have the engine up and running, safety becomes paramount. Be certain that the aircraft is not moving. Float plane pilots understand that as soon as the prop turns, the aircraft starts moving and must have a clear path and be directed by the pilot. We have brakes and so more control, but it is all too easy to be absorbed by our duties and fail to notice that the airplane is creeping toward danger. So, be certain that the airplane is restrained, check the oil pressure, and lean the mixture. Why should we lean? Aircraft engines are set for an excessively rich mixture at idle. You can test this sometime by leaning the mixture slowly when you shutdown after flight. You should sense the RPMs increase prior to shutdown as you move to a leaner mixture on your way to lean cutoff. Leaning after start and before taxi will keep the plugs cleaner, prolong engine life, reduce emissions, and help to avoid the bad mag checks that occur with fouled plugs. You simply cannot hurt a piston engine by leaning it at idle and taxi power settings. I recommend that you lean aggressively. In fact, aggressively or not at all. What is the only disadvantage of leaning after start? Again, you cannot hurt the engine. As far as the engine is concerned, the leaner the better as long as it continues to run. The only danger is forgetting to put the mixture to rich before takeoff and generating either too much heat at takeoff power or not enough power and ending up in the trees. If you lean aggressively – right to the ragged edge – you will protect yourself from that oversight. When you advance the throttle on a very lean mixture, the engine will simply shut down, thus protecting you from finding yourself in the air without enough power or with a detonating engine. So, either lean very aggressively or not at all. The engine would prefer you lean but the greater danger is trying to take off with a slightly lean mixture.
The best article I have ever read on this entire process is this article by John Deakin on starting and running up your aircraft engine. I highly recommend it.
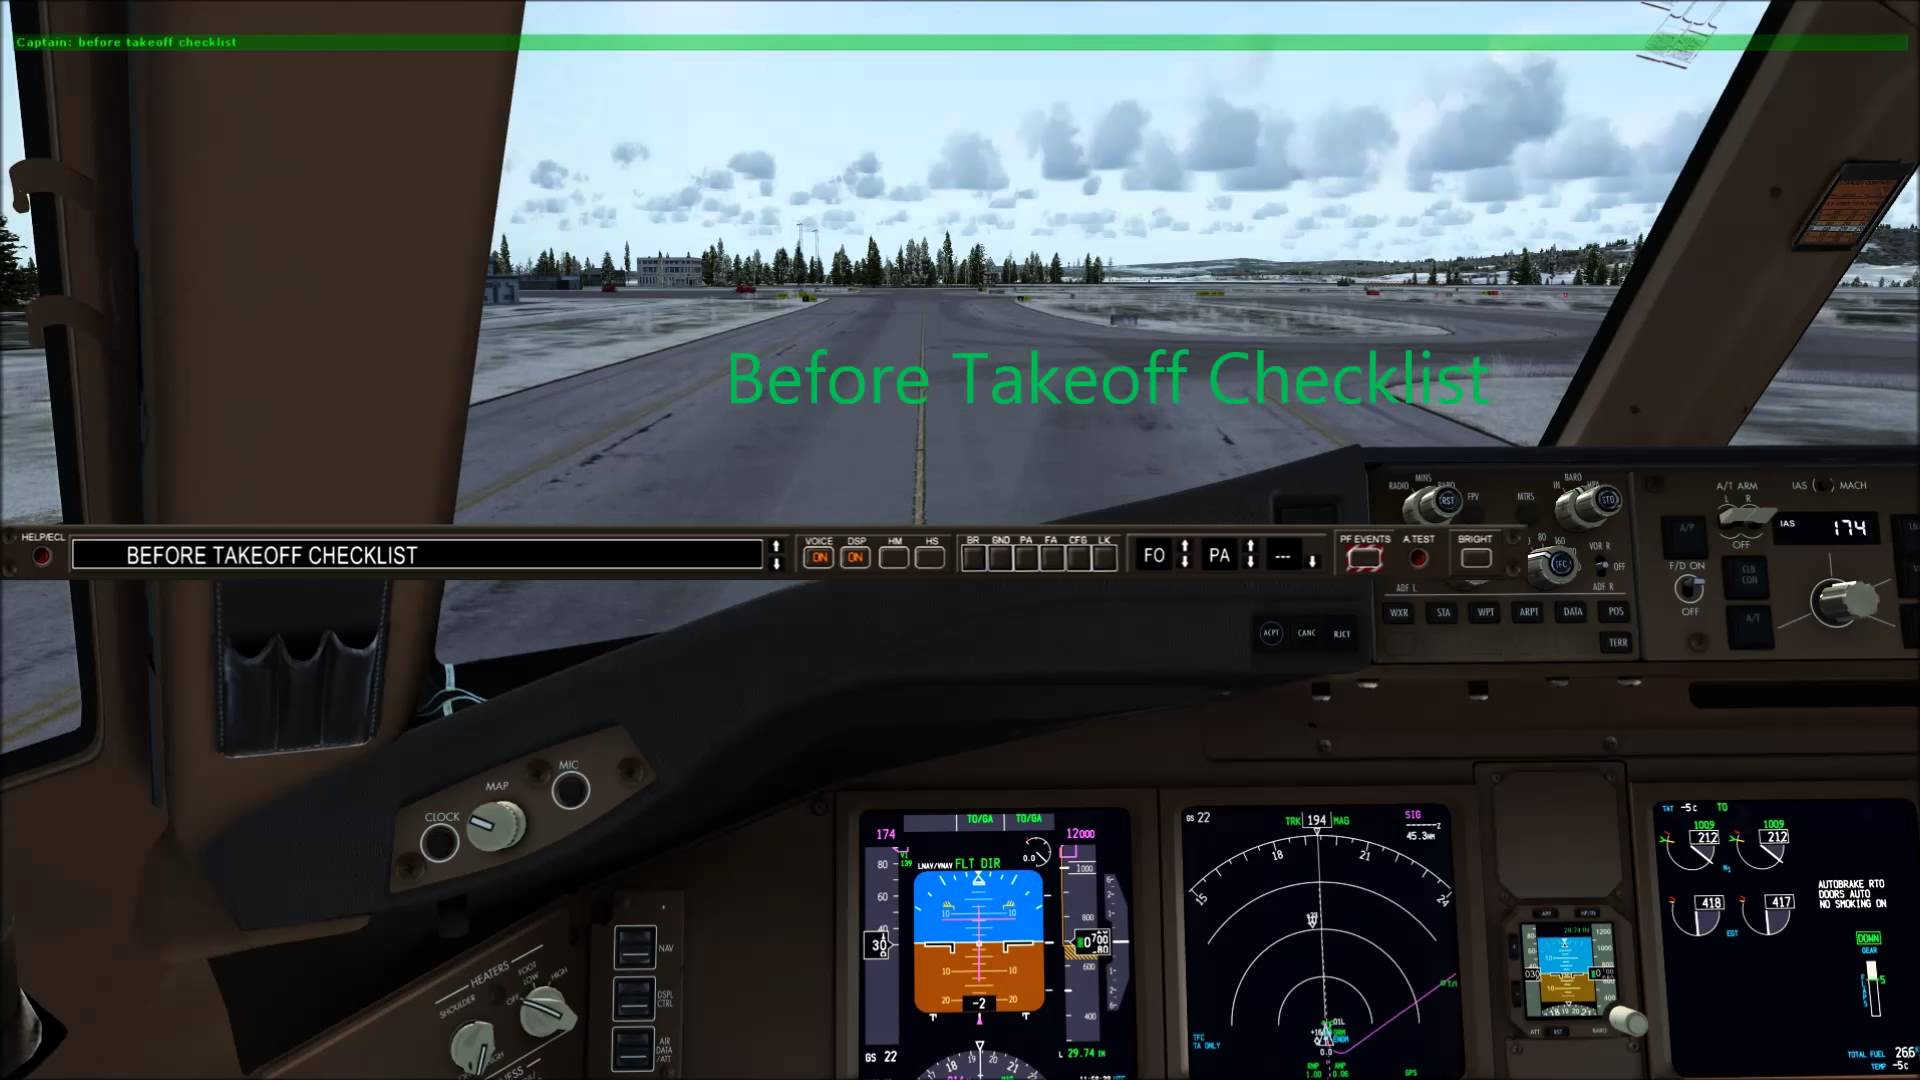
The before takeoff checks, aka the “run up”
Every checklist in every airplane you will ever fly will have a section titled something like “Before Takeoff.” While the nomenclature may change from one aircraft and operation to another, the fundamental concept is universal in aviation. Before we commit ourselves to take flight, we must demonstrate the proper function of crucial aircraft systems and confirm that we have readied the airplane and ourselves to fly. Of course, we make many preparations for flight: flight planning, weight and balance calculations, proper fueling, and a preflight walk-around of the aircraft. Each is important. At the very last, however, just before launching into the air, we want to make one last check of our readiness and that of our aircraft. The specifics will vary depending on the type of aircraft and, to some extent, the nature of the mission, but certain universals pertain. We want to know that the airplane is both capable of flight and that we have configured it properly. Most notably, we want to know if the engine is going to perform to standards, that our electrical system (if we have one) is performing properly, and that our vacuum system or whatever source of energy drives our instruments, is working properly. These are things that cannot be determined until the engine is running, so they are accomplished just prior to taking the runway. Beyond those critical elements, we will configure the aircraft for flight and make last-minute preparations. All of these tasks, taken together, are known in the vernacular as the “run-up.” The name comes from the fact that we will run up, or power up, the engine to something resembling normal power to make the critical engine checks.
Some general thoughts … where and when
We can think of the before takeoff checklist as containing tasks of several different sorts: the numerous configuration reminders (flap settings, trim settings, instrument settings, avionics settings); the actual run up wherein we power up the engine and check its performance and the electrical and vacuum systems; and a takeoff briefing in which we remind ourselves how we will accomplish the takeoff (rotation speed, flap setting, climb speed, etc.) Of these, only the engine run-up need be accomplished at more than idle power.
Where should we do these before takeoff checks? It depends. Common courtesy and experience are helpful here. It is rude to do an actual run up on the ramp around other aircraft and persons. Powering up the engine is loud and obnoxious and creates a small hurricane behind the aircraft, buffeting nearby aircraft and blowing dust and dirt on anything behind. (The most obnoxious example occurs now and then at Oshkosh where a pilot planning an early morning departure conducts a run up in the camping area, blowing over tents and scattering belongings.) That being said, the other preparations that are part of this process can be accomplished on the ramp without too much imposition – setting the instruments and such – although I don’t like to prolong my time on the ramp with the engine running of people are in the area. A spinning prop always has the potential for tragedy.
So, if we choose not to do our run up on the ramp at the tie down, where do we do it? The other common practice is to start the airplane and immediately taxi out to the runway and do our run up at the hold short line on the taxiway just short of the runway. This has the virtue of making those critical checks immediately prior to taking the runway for departure. This has merit. We have no intervening time between our run up and our takeoff so we have determined with all certainty possible that, at the moment of takeoff, our systems are functioning properly. If we do our run up on the ramp and then make a long taxi and a long wait prior to taking off, it is possible for the plugs to foul or something to fail in the interim. So it is reasonable to want to make these checks at the runway when we are number one for takeoff.
There are two problems with this practice. If we are in a line of aircraft waiting for takeoff, our run up may blast the aircraft behind us with dirt, dust, and a buffeting wind, which is, at the least, discourteous. Also, if we are at a busy airport, the time it takes to perform these before takeoff checks may delay any aircraft behind us who may be ready to takeoff.
What is the answer? The answer, I am afraid, is to use common sense and common courtesy and a practice suitable to the time, place, and circumstance. At some busy airports, you want to be ready to take off when you reach the hold short line – particularly if you are sharing the airport with jets, which typically do not do run ups (not required for jet engines) and typically are flown by two pilots who are able to accomplish these checks while taxiing and so are usually ready to takeoff when they reach the runway. At other airports, with little traffic, it makes sense to leave the ramp and taxi to the runway hold short line to do the before takeoff checks.
Sometimes a compromise solution can be to do the configurations and preparations part of the before takeoff checks on the ramp and leave the actual run up for the final moments just before taking the runway.
Another useful practice may be to taxi away from the tiedowns to an unoccupied section of the ramp, far away from persons and other aircraft and accomplish the before takeoff checks in an isolated area where we other no one. Use courtesy and do what is appropriate to the situation.
The specifics of the before takeoff checks
Each aircraft and each mission will have slightly different tasks to perform, but, in general, you will find items such as this on your before takeoff checklist.
Configurations and settings:
Flight instruments
Avionics and radios, including transponder
Flaps
Trim
Fuel
Lights as appropriate
Engine and system checks, aka the “run up”
Magnetos (ignition)
Engine instruments (oil pressure, oil temperature, fuel pressure)
Propeller governor and feathering system
Vacuum system
Electrical system
Flight controls
Reminders
Seat belts and shoulder harnesses
Doors and windows closed
Fuel quantity adequate & fuel valves set
Auxiliary fuel pumps as appropriate
Any given checklist will address each of these items in an order that seems most logical to the author of the checklist, so let’s look at each of the tasks with the understanding that they can be addressed in various order in a given aircraft.
Configurations and settings:
These are the settings that should be configured for the mission, the type of takeoff anticipated, and the flight conditions pertaining at the moment of takeoff.
Flight instruments
Regardless of whether we are flying an airplane with the traditional array of steam gauges or with a glass panel, we want to check the performance of our flight instruments and set them for the prevailing conditions. The airspeed indicator should read zero. The attitude indicator should be erect and should not show a bank when we make a taxi turn since we are turning without banking. The altimeter should be set to the local altimeter setting and, when so, should indicate the field elevation. (For IFR flight, the standard is plus or minus 75 feet of the field elevation.) The turn coordinator should show no indication of a turn when we are stationary. The inclinometer (the “ball”) should show neither a slip nor skid (centered), and the failure flag should be off. The heading indicator should agree with the whiskey compass, give or take, and both should indicate a plausible direction based on your positional awareness, and the vertical speed indicator should indicate zero or a small deviation from zero that we can remember and assume to mean zero. These are our basic flight instruments and are carried forward in some fashion in even the most technologically advanced aircraft. You may be introduced to “IFR taxi checks” which are a traditional part of the before takeoff checks in preparation for an IFR flight where our safety will depend on the performance of the gyroscopic instruments. As we taxi, we should note that the attitude indicator does not indicate a bank as we turn, that the turn indicator indicates a turn in the proper direction, and that the heading indicator indicates a turn from and to plausible directions and moves smoothly without hanging or hesitating. Finally we should note that the compass moves freely and indicates properly.
Avionics and radios, including transponder
Here we want to set our communication frequencies suitable to our departure airport. These might include an AWOS or ASOS or ATIS, a ground frequency, a tower frequency, a departure frequency, or a CTAF frequency – appropriate to the radio capability of the aircraft and the departure airport procedure. We will set our squawk code in the transponder (1200 for all VFR flight unless we have a squawk code for VFR flight following from ATC) and we will turn our transponder on and usually squawk mode C or “alt.”
Flaps
Every takeoff requires a specific flap setting. In our training airplanes, we typically make normal takeoffs with flaps retracted (0 degrees). For specialized takeoffs, such as short-field or soft-field takeoffs, we will usually use a partial flap setting. In larger airplanes, partial flaps are typically used for all takeoffs. In very large aircraft, such as air-carrier jets, flaps are almost always used for takeoff and the specific flap setting may depend on the takeoff weight of the airplane and other environmental factors – and an improper flap setting can be, and has been, a critical, sometimes fatal, mistake. For these reasons, we reference the flap setting on the before takeoff checklist and set the proper flap setting for our planned takeoff at this time.
Trim
Our trim setting is also critical to a successful takeoff. Although we think of a trim setting as setting the attitude of the aircraft, we are really trimming an airplane for a given angle of attack, which is not quite the same thing. Before takeoff, we want to trim the airplane for the angle of attack that will produce our desired climb speed, usually something close to Vy (best rate of climb) initially. How do we know what trim setting will give us our climb angle of attack? A “takeoff” setting is usually marked on our trim indicator. We set the indicator at that point. In large jets, the trim setting again is more critical and must be adjusted for weight and balance. In our light airplanes, an approximate setting at the “takeoff” mark is close enough. This will encourage the aircraft to rotate at the appropriate speed and settle into the target climb speed.
Fuel
Each airplane will have its own unique fuel system. Understand its nuances. All fuel shutoff valves and fuel tank selector valves should be set and checked as necessary.
Lights
Interior and exterior lights should be set as appropriate for the flight, including taxi and landing lights, beacons, strobes, and navigation lights. Panel, instrument, map, overhead, and cabin lights should be set.
Engine and system checks, aka the “run up”
This is the point at which we push the throttle in and accelerate the engine to a moderate speed to perform checks of critical flight systems that can be confirmed only with the engine generating power. How much power? Each aircraft manufacturer will specify a speed for the engine checks. It will usually be somewhere around the approach power setting, perhaps fifteen hundred to nineteen hundred RPMs. Frankly, the exact number is not that critical. We simply need enough power to raise the alternator output to something near its rated output, to spin up the vacuum pump to the normal vacuum range, and to stress the ignition system sufficiently to expose any weaknesses or failures. If your checklist says 1700 RPMs, don’t worry if your run up is done at 1600 or 1800 or 1737 RPMs. It doesn’t really matter, plus or minus a hundred or two. What matters is what happens next.
Magnetos
When we check out magnetos, we are checking the engine ignition system. Aircraft engines have dual magnetos. The nature of magnetos and the means by which they generate an electrical spark is beyond the scope of this discussion. Simply understand that magnetos do not require electrical power from an outside source. The simply require something to make them spin around. If the engine is turning, the magnetos are turning and, if they are operating properly they are making an ignition spark.
Secondly, please understand that in the standard aircraft engine installation (other than those few newer airplanes with electronic ignition, which has its own redundancies) we have two magnetos, each of which fires a spark plug in each cylinder. To look at it another way, each cylinder had one plug from the left magneto and one plug from the right magneto, so if a magneto fails there remains a firing spark plug in each cylinder and the engine will continue to run smoothly, albeit with marginally less power due to the marginally less efficient combustion generated by a single plug in each cylinder rather than two.
How do we check the magnetos? We isolate first one and then the other, grounding each one alternately. We do this by either turning the magneto key or slipping the magneto switches. In our training airplanes, we usually have an ignition key much like our automobile. The difference is that while our car has something like OFF / ACCessory / ON / START our aircraft will have OFF / L / R / BOTH / START. When we are running normally, the key is on BOTH. For our mag check, we first move it to R, which grounds the L mag and leaves on the R mag plugs firing in each cylinder. (We can check the L or R mag first. The order doesn’t matter. Just do it the same way every time.) What do we look and listen for and what does it tell us? We should see on the tach, hear with our ears (yes, I know that’s redundant), and sense a slight but not excessive reduction in engine speed. The engine should continue to run smoothly but at that slightly slower speed. Why slower? Because we have grounded one plug in each cylinder and the combustion is slower and less efficient. If we get no drop, we are not grounding the other magneto. The engine will run fine, but we have a dangerous situation. When we turn off the key, we may have one magneto still “hot,” as we say, which means that should someone turn the prop (and therefore the engine and therefore the mags) the engine could fire. Remember, mags do not require an outside source of electricity. That prop could hurt or kill someone near it. This is a situation that will not adversely affect your flight but should be repaired as soon as possible. If, when we ground one mag, the engine not only slows down but runs rough, it means that one of the plugs on the remaining mag is not firing properly. We have exposed a deficiency that is normally masked by the presence of another plug in that cylinder fired by the other magneto. This might be simply a fouled plug or a more serious magneto problem. If it is simply a fouled plug, we might be able to clear it – discuss this with your instructor . If it is a mag problem, it’s time to call maintenance.
Engine instruments (oil pressure, fuel pressure)
We have checked the performance of our magnetos, our ignition system. We should also check the systems that lubricate and fuel the engine. We should have checked the oil pressure immediately after start up. If the engine is not being lubricated, it will have a very short life. I once saw a new aircraft engine started up without oil; within three minutes it had come to the end of its useful life. Now, with the engine accelerated above idle, to some modest power setting, we are going to check the oil pressure and the indications of our other engine systems. This would include oil pressure, oil temperature, cylinder head temperature, fuel pressure, and perhaps exhaust gas temperature, depending on the instrumentation in our aircraft. Oil pressure should be solidly in the green, or normal, range. Oil temperature may not have quite reached the green range, but it should be rising toward normal. Fuel pressure should be normal. Cylinder head temperature may be somewhat less than the normal range, but it should definitely not be above the normal range. You may be told not to attempt a takeoff until the oil temperature reaches the normal range; that’s not unwise, but it is not really necessary. If the temperature is at least rising and the engine will accelerate smoothly without stumbling, the engine is ready for takeoff. However, particularly with larger displacement engines, you will prolong the life of your engine by accelerating it gradually as you apply takeoff power – consistent, of course, with the length of your runway and other circumstances. Going from idle power to takeoff power applies thermal stress to the engine – particularly larger or turbocharged engines – and moderating that rate of change is helpful to the engine.
Propeller governor and feathering system if constant speed propeller
If the aircraft has a constant speed propeller, its operation should be checked at the prescribed speed for stable control of rpm through the propeller lever or knob and the feathering capability should be confirmed.
Vacuum system
We are now beginning to see all-electrical airplanes in the general aviation fleet, and they present special cases, but in the instrumentation system that has been typical in GA airplanes for decades, the vacuum system typically powers two of our gyroscopic instruments: the attitude indicator and the heading indicator (otherwise known as the directional gyro). In most installations, the third gyroscopic instrument, the turn coordinator (or the older turn and bank) is electrically power to provide redundancy in case of a vacuum failure. Vacuum is provided to these gyros by an engine-driven vacuum pump. These pumps do fail. For reasons beyond this discussion, they typically fail totally. You should find either a vacuum gauge or a low-vacuum idiot light in the panel of your aircraft and you should check to be certain that, at run-up power, the vacuum pump is providing adequate vacuum. (Nor should the vacuum be excessive. Most idiot light installations also include a high-vacuum indication. Excess vacuum should be vented by a relief valve. If that valve fails, excess vacuum can damage the gyros.) This needs to be checked at run up power. At idle power, the pump may not provide full vacuum.
Electrical system
Also during the run up we want to check the performance of our electrical system. There are two typical types of ammeters found in general aviation training aircraft. One, typical of Pipers, is a load meter, which shows the load in amps imposed on the system (and the output satisfying that load). If this type of meter indicates zero, the alternator has probably failed and the battery will soon be exhausted, shutting down everything electrical in the aircraft. This might include radios, lights, the turn coordinator, some engine instruments, the flaps, perhaps even gear retraction and deployment. In VFR flight this should not constitute an emergency. Simply look out the window and fly the airplane to a successful landing. (If the gear requires electricity to deploy, there will be an alternate, emergency means of lowering the gear, which you should be familiar with if you are flying a retractable-gear aircraft). Loss of electrical power can be a significant nuisance and even something of a hazard, depending on where you are when it happens and how you handle the situation. In instrument conditions on an IFR flight, loss of electrical power can be a life-threatening emergency if it compromises navigation instruments necessary to conclude the flight.
In all cases, bear in mind that the aircraft engine will be unaffected by the loss of electrical power – the magnetos will continue to ignite the engine and it will continue to run normally. (This is why we have magnetos in aircraft. It is a crude, old-fashioned means of ignition, but it is independent of electrical power, unlike your automobile which will cease to run if the alternator fails and the battery is exhausted.) The other type of ammeter, typical of Cessna single-engine aircraft is what we will call a charge – discharge meter. It normally rests at zero. If it shows positive, the alternator is charging the battery, which might be the case after a difficult start that required significant cranking of the starter. If it shows negative, it indicates that the battery is discharging, which means the alternator is not meeting the electrical load or has failed entirely. In either case, the battery will become exhausted. If this happens in flight, we have emergency procedures to follow; if we detect this situation on the run up we can avoid having it happen in flight.
In some aircraft, we may have other checks to perform during the run up, but, basically, we are going to check the performance of our engine, our electrical system, and our vacuum system. Other tasks on the before-takeoff checklist can usually be performed at idle power.
Flight controls
Our flight controls are the aerodynamic controls over the three axes of flight: ailerons for bank, elevator for pitch, and rudder for yaw. (This incidentally was the genius of the Wright brothers to recognize the need for controlling an airplane in three axes and designing a system to accomplish that control – the same system we have used ever since.) You will usually find on your checklist a reference to checking that these controls are “free and correct.” This means that we check for both freedom of movement through the entire range of motion and also movement in the correct direction. There are numerous memory aids for remembering the correct direction of movement, but a little thought will accomplish the same thing. We rotate the yoke (or stick) to the left and note that the ailerons move so as to effect a bank and turn to the left. Think about which way the left aileron would need to move … it should deflect upward to drive the wind down and bank left. Look to confirm that it rises. Look to the right to confirm that the right aileron deflects downward. Similarly, pull the yoke or stick back and look to see that the elevator deflects upward. Push it forward and check that it deflects downward. You may not be able to see the rudder, depending on the airplane, but you should at least check for freedom of movement and note during taxi that the rudder pedals seem to be driving the rudder in the correct direction. Free and correct – remember, those are two separate checks.
Reminders
Your before takeoff checklist will also include several reminders. These are simply last-minute checks of items that need to be in place or considered before committing oneself and the airplane to the air. In our training airplanes. we may have nothing more than a reminder to check our seat belts and shoulder harnesses and our doors and windows closed. We will probably have a reminder to set our flaps as necessary and to set our trim for the takeoff position. We may have a reminder to note our departure time (for fuel planning). Fuel selectors and valves should be set and checked. If an auxiliary boost pump is prescribed for takeoff, it should be checked on before taking the runway. Depending on the complexity of the airplane, we may have a dozen or more reminders. As one would expect, the more complex aircraft will have more critical settings to confirm, but the principal is the same: the aircraft and the pilot must be ready to fly.
In summary
Each task on our before-takeoff checklist may take only a moment to perform, but it must be appraised with a practiced eye and we must understand the principal behind each item we check for the action to be meaningful. A proper before-takeoff checklist, properly performed, should leave us confident in our readiness and able to free our mind to concentrate on the takeoff and initial phase of flight. Every flight involves chance. A proper before takeoff check biases many of those chances in our favor. As a great basketball coach liked to say, quoting Louis Pasteur, “Chance favors the prepared mind.”


